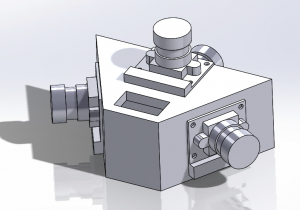
This project has evolved considerably since I last posted, and since I wrote my first proposal. There will be 4 wide angle Pi cameras, each connected to a Pi Zero. Each of these Pi Zeros will be connected to a Pi 3 “MasterPi” via USB. Previously I had planned to utilize USB cables to connect each Zero to the MasterPi. The ClusterHAT eliminates the need for this many wires, and should also simplify interPi communication. As power is also drawn from the GPIO pins, all of the Zeros can be safely powered through this HAT. The Pi 3 has built in Wifi capabilities, therefore none of the Zeros will need a wifi HAT, which is fortunate because the ClusterHAT’s spacing does not allow for HATs on the Zeros.
This week I received most of the parts I need. I now have 5 wide angle cameras, a Pi 3, the ClusterHAT, and two of the four needed Pi Zeros and camera cables. I spoke with a few people at Terrapin Works, who had suggestions as to how I would attach my cameras to the mount I designed.
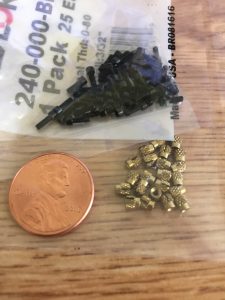
After a lengthy discussion and some very small measurements, we determined that the best approach would probably be to use 3/16” long hex screws. Unfortunately, the tolerances on the 3D printers I have available to me are such that I would not be able to reliably or accurately print screw sized holes in this mount. To circumvent this issue, I can use screw inserts. These small threaded nuts are large enough to print holes for, and the screws can be screwed into them. Any excess gap would be filled with glue/epoxy. The picture below shows these screws (black) and inserts (gold) with a penny for scale.
This week I’m planning on modifying and printing the camera mount. As soon as this is done, I can begin verifying the camera configuration and begin working on the photo stitching.
I outlined a list of tasks that each Pi will need to be able to do. The “Dashboard” mentioned below will be a web-based control interface for this system. I hope to modify a similar interface I have from a previous project.
MasterPi Program (Run on boot)
- Connect to Wifi
- Become a client and connect to Dashboard
- Connect to Zeros
- Be ready to accept program parameters from the Dashboard (but should be launchable offline)
- Duration (Default: Until stopped)
- Photoshoot name (Default: Date + StartTime)
- Photo interval (Default: 1/min?)
- Be ready to report errors and status updates to the Dashboard
- Some way to signal readiness, busy/active (LEDs)
- Green – Ready
- Yellow – Busy – Do not Power Off
- Red – Error
- Signal the Zeros to take a photo
- Report to dashboard the initiation of photoset #
- Copy the photos from each Zero to a photoset specific folder
- ex: home/pi/Photoshoot_name/Photosets/#
- Ensure MasterPi won’t crash if a Zero misses a photo – but notify
- Report to Dashboard the successful capture of photoset #
- Stitch the photos from the photoset into an equirectangular frame (EQRF)
- Save the EQRF to a photoshoot specific folder (so that all EQRFs end up in one sequential folder)
- Photoshoot name + photoset # +.jpg
- ex: home/pi/Photoshoot_name/EQRFs
- Repeat steps 6-9
- Finish any stitching (if necessary)
- Command the Zeros to shut down
- Signal to Dashboard that this has been completed (or initiated)
- Shut down
Step 9 is currently the most difficult and elusive of the listed steps. I think I could pull off the rest of the steps with my current knowledge and skill. Step 6 might not be easily possible with the ClusterHAT hogging most of the GPIO pins, but a closer evaluation is needed to know for sure.
The steps needed for each of the Zeros are simpler, but equally important.
Zero Program (Run on boot)
- Accept MasterPi connection
- Intake photoshoot name from MasterPi
- Listen for MasterPi command for photo
- Save photo in photoset specific folder
- ex: home/pi/Photoshoot_name/Photosets/#
- OR save photo numbered sequentially in Photoshoot specific folder.
- ex: home/pi/Photoshoot_name/PiName+Photo#.jpg
- Report any errors to MasterPi to pass on to Dashboard
- Repeat steps 3-5
- Await shutdown command from MasterPi
I wanted to take a brief moment this week to reflect upon time. This project is fundamentally about time and it’s passage. The end result will be an immersive time-lapse experience that reveals the passing of a day in mere seconds – inviting its viewers to ponder time. This unique temporal perspective will only become available after a semester of considerable effort and time. I recognize now the need to carefully budget and manage my hours this semester to make this project a reality. I have confidence in my organizational skills and the time-planning systems I have already put into place.

